

How To Use Arduboy Uploader
In this tutorial, nosotros are going to build a handheld game console using Arduino Pro Micro, Arduboy package, and a handful of hardware. For those who don't know, Arduboy is an 8-bit, credit-carte du jour-sized programmable gaming system inspired by Nintendo Gameboy. Arduboy is a game evolution organisation based on the popular open-source Arduino platform. It is really like shooting fish in a barrel to learn, share, and play, allowing us to acquire to lawmaking and create our games. The original Arduboy game package is based on an ATmega32U4 microcontroller and 128x64 Pixels serial OLED display. So, to build this project you should accept an ATmega32u4-based Arduino microcontroller and a 6-pin SPI Based OLED display.
Nosotros accept used NextPCB to fabricate the PCB boards for this project. NextPCB is an experienced PCB manufacturer specialized in the PCB manufacturing and assembly industry for more than than fifteen years. They provide loftier-quality industry-standard PCB with a very quick turnaround time, as low as 24 hours. They tin can also provide other turnkey solutions similar component sourcing, PCB prototyping, quality testing, etc. Nosotros will explain more than on how to use NextPCB later in this article, but for now, let's discuss the design and working of our Handheld Game Console.
Components Required for Handheld Game Console
- 1x Arduino Pro Micro (5V)
- 1x OLED Display (SPI)
- 6x Tactile Push Button
- 1x Cablegram
- 1x 7805 Voltage Regulator
- 1x 4mm SPDT Slide Switch
- 2x 18650 Cell
- 1x 18650 Double Jail cell Battery Holder
Circuit Diagram for Arduino Handheld Game Console
The complete circuit diagram for edifice the Arduboy game clone is shown below. As this is a clone board, we used the same components every bit the original board. The schematic was fatigued using EasyEDA. The excursion consists of an Arduino Pro Micro, SPI OLED Display Module, voltage regulator, and some push button buttons.

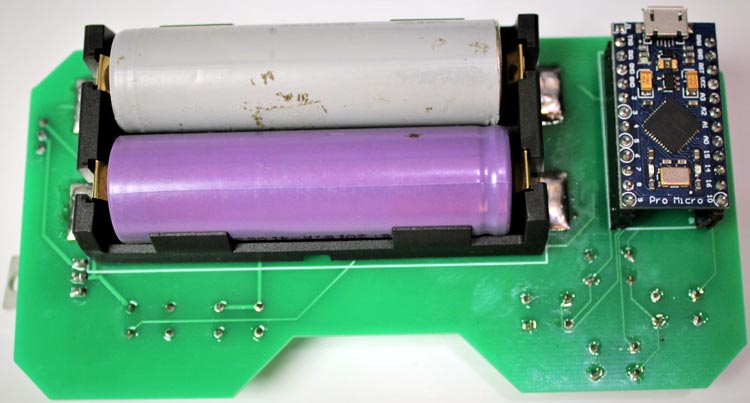
This consummate setup is powered past two 18650 cells connected in series. Output voltage from these cells will be around 7.4 then a 7805-voltage regulator is used to supply regulated 5V to Arduino pro micro and other modules. The complete connections are every bit follows:
| Arduino Pro Micro | OLED Brandish |
| Vcc | Vcc |
| GND | GND |
| D15 | SCL |
| D16 | SDA |
| D4 | DC |
| D2 | RES |
| Arduino Pro Micro | Button Buttons |
| A0 | UP |
| A3 | Down |
| A1 | Right |
| A2 | Left |
| D7 | A |
| D8 | B |
| Arduino Pro Micro | Cablegram |
| D5 | Positive |
| D6 | GND |
Designing a PCB Arduboy
At present that nosotros sympathise how the schematics work, we can go on with building the PCB for our project. Y'all can design the PCB using any PCB software of your selection. If y'all are a beginner who is but getting started in the world of PCB, we would recommend you to cheque out the getting started guide for PCB Designing. If you want to skip the design processes, you tin can also download the Gerber file of this Handheld Game Console project using the link below:
Download GERBER file for Arduboy
You can also bank check out the other PCB projects that we accept previously built on Circuit Digest if y'all are interested. Now that our Design is fix, it's time to get them made using the Gerber file. Getting your PCB fabricated from NextPCB is easy; just follow the steps given below.
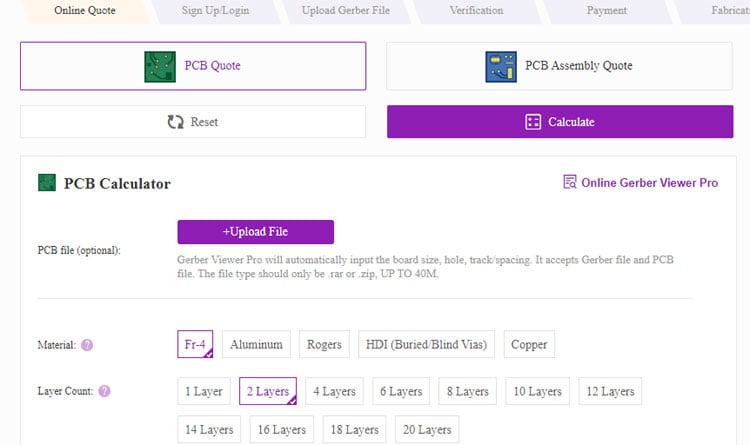
Stride 1: Go to www.nextpcb.com sign upwardly if this is your first time. And then, in the next window click on 'Quote at present'.
Step2: Now in the next window, upload the Gerber file, and fill out the other important details like dimensions of your PCB, the number of layers, and the number of PCBs you require.
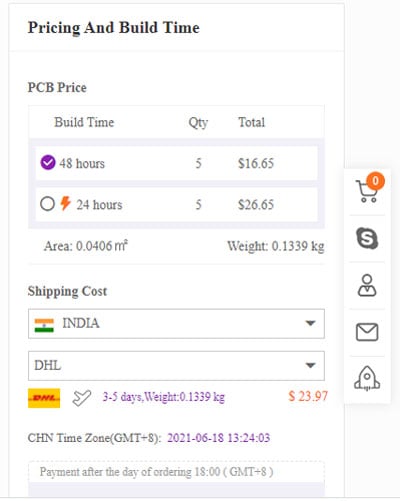
In the next step, y'all have to select the build time, shipping country, and shipping method. The concluding cost of the PCB depends on the shipping country and aircraft method.
The final step is Checkout. To make sure the procedure is smooth; NextPCB first verifies all the details and Gerber file before proceeding with the payment. This mode, yous tin be sure that your PCB is fabrication-friendly and volition reach you every bit committed.
Assembling our Handheld Game Panel Board
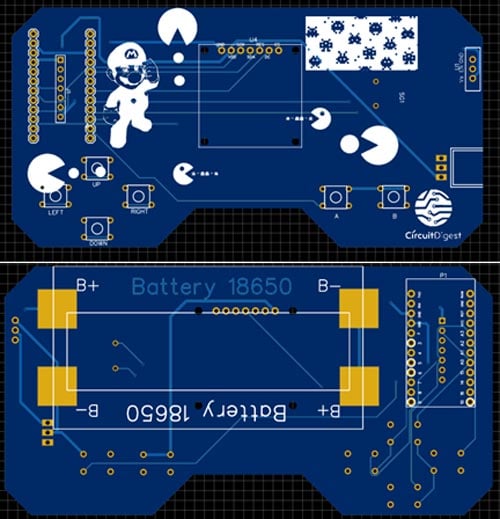
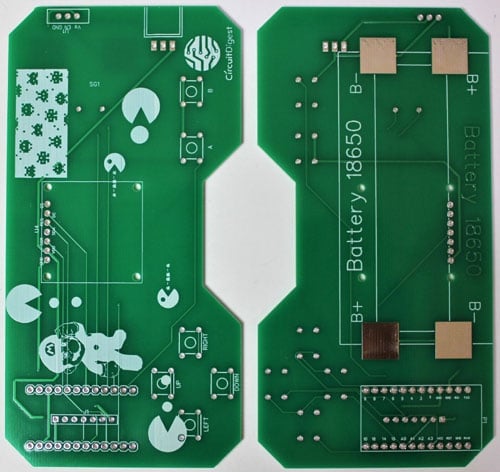
Later on a few days, we received our PCB from NextPCB in a neat parcel and as you can see below, the PCB quality was skilful as always. The tiptop layer and lesser layer were seamlessly done with proper visa and track spacing. The tiptop layer and the bottom layer of the board are shown below.
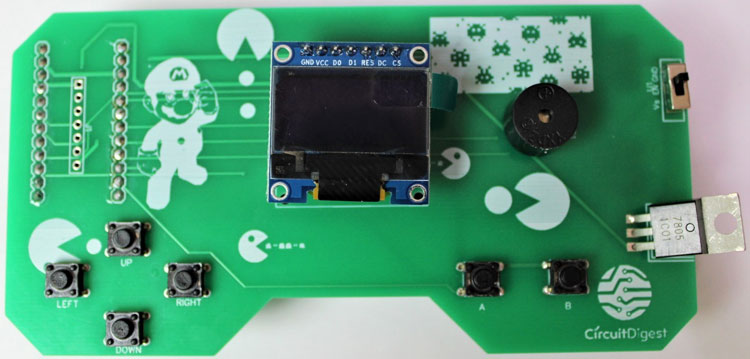
After making certain that the tracks and footprints were correct, I proceeded with assembling the PCB. The completely soldered lath looked similar as shown in the image below:
Programming Arduino Pro Micro for Playing Arduboy-Homemade Games
Now to play the Arduboy games with Arduino Pro Micro, we first have to add the Arduboy Bootleg package on Arduino IDE. This package includes all Arduboy libraries with support for alternating displays and wiring.
To install the Arduboy package, Open the Arduino IDE and then get to File > Preferences.
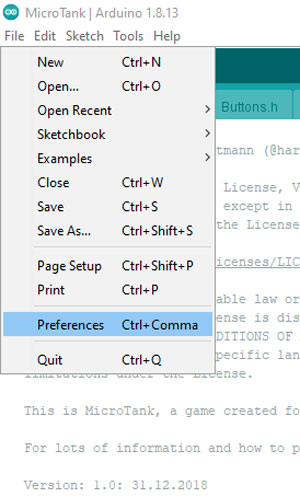
Then copy and paste the URL below in the Additional Boards Manager URLs box and click on OK
https://raw.githubusercontent.com/MrBlinky/Arduboy-bootleg-packet/master/package_arduboy_homemade_index.json

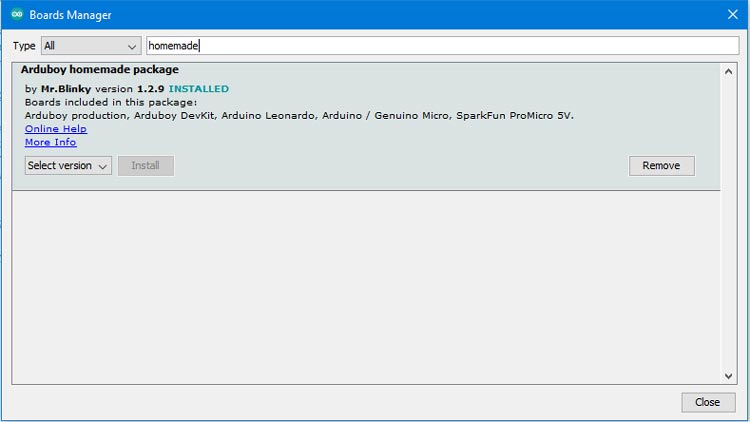
Then go to Tools > Boards > Board manager and in the text box type homemade or Arduboy homemade. Click on the Arduboy Homemade package and click the Install button.
With this, we accept added the Arduboy packet on Arduino IDE and at present nosotros tin download and play our favorite Arduboy game on our Game Panel. So, become ahead and download whatever game from Arduboy. After that, open up up the .ino from the game binder. Then become to the Tools card and brand the selection equally follows:
Lath: Arduboy
Bootloader: Cathy3K
Core: Arduboy optimized cadre
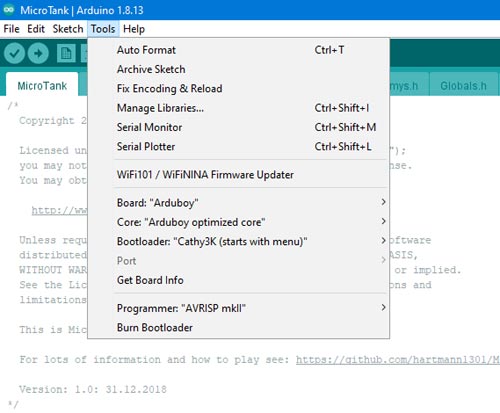
Afterwards that, select the port to which Arduino micro is connected and striking upload.
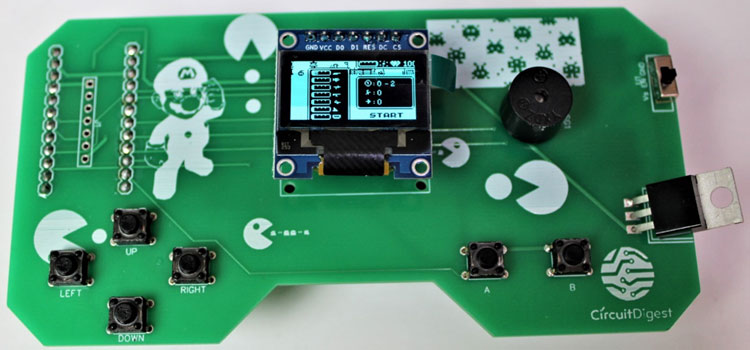
Testing our Arduino based Gameboy
Afterwards uploading the code plug in the Arduino and 18650 cells and yous should come across the OLED display start up a demo of the game. Push button A is used to showtime and stop the game while Push push B is used for Assault.
I promise you enjoyed building this project. A complete working video is given below. If you accept whatever questions, please leave them in the comment section.
Code
#include "Globals.h"
#include "Draw.h"
#include "Sprites.h"
#include "Items.h"
itemsManager iM;
#include "Animations.h"
animationManager aM;
#include "Player.h"
playerTank pT;
#include "Projectiles.h"
projectileManager pM;
#include "Enemys.h"
enemyManager eM;
#include "Map.h"
mapManager mM;
#include "Spawn.h"
spawnManager sM;
#include "Buttons.h"
#include "Checks.h"
void setup() {
#ifdef USE_SERIAL
Serial.begin(57600);
Series.println(F("MicroTank!"));
0 Response to "How To Use Arduboy Uploader"
Post a Comment